Fiiiiiinally I have an entry into the Made It challenge!
Not too long ago, my sister-in-law Krystal asked me to make her some crocheted flowers for wine glasses – you know the little thingies that identify whose glass is whose. At the time I filed it under WGTIS (Will Get To It, Sometime) in my brain with all good intentions of getting there.
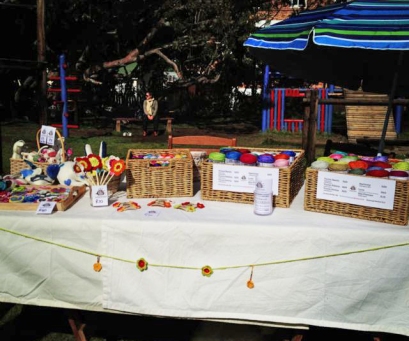
Yesterday, Vicky and I had tiny table at one of the local schools Spring Fair so for the past week I have been frantically making odds and ends to display alongside our yarn. For us it was an opportunity to give our Woolhogs Online yarn shop some publicity (see, I just shamelessly did it again heehee). Just for the record…I take my hat off to all of you that sell your products at markets. The stress is enormous and the time spent making stuff seems endless!!! Thank heavens we mainly sell yarn as I think I would seriously give it up as a bad idea.
Anyway, I wanted to make a few flowers so naturally I went to Lucy for some inspiration – her May Rose pattern is so sweet and her tutorials are good enough for even the newest of newbies to grasp. I must be honest, my attempt to roll and sew it to resemble a rose made me want to fling my hook at something – my shortcoming, nothing to do with the pattern. But after a deep breath and a second attempt I discovered that the unrolled work looked a lot like the flower wine glass thingies I had envisioned. Eureka!!!!
So, I fiddled and fumbled but finally tweaked it so that I got what I was hoping for. Here it is
- I used Vinnis Colours Bambi which is a 70% cotton 30% bamboo blend and a 4mm hook
- SC = US Single Crochet DC = US Double Crochet
- Thread a bead onto your yarn (not the easiest thing in the world! I used very thin wire and used it like one would use a needle threaders – bend wire, insert into bead, thread yarn through the “eye” and yank hard)
- Secure the bead with a slip stitch
- Chain 14
Row 1. SC in the first 11 stitches (leaving 3 at the end – these will become the little beaded tail)
Row 2. Turn work (but don’t chain 1) * Work 6 DC in the first stitch, sl stitch in next *First petal made.
Repeat between * another 5 times to the end and fasten off
See how the work naturally want to coil?!
Lastly – at the bead end – weave the tail in between the original 3 chains to give it some firmness. Sew the other end along the base line too.
They natural coil means they simply fit onto the base of a wine glass without needing to be secured.
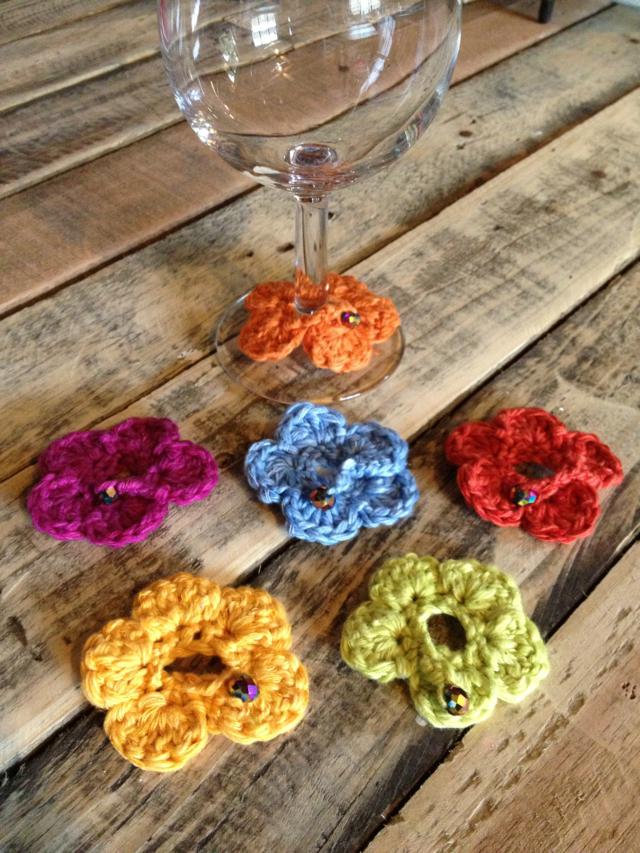
Whip up another 5 of these little babies and you have yourself a full set of IdentiDaisies (the term, appropriately termed by Krystal)
I call theses Summer Fruits (just to be childish – and because I am OCD like that). Orange, Plum, Blueberry, Strawberry, Banana and Apple. See!
And there you have it….Roll on Summer!
For those of you in the Northern Hemisphere, these may brighten up your chilly evenings – either way, give them a go.
Clink Clink!


I wish I could make these little flowery things, they’re so pretty! I’m reading your tutorial and I’m sure it’s pretty simple but for someone like me, I’m still trying to decode —yarn and beard are the things I’m familiar with, and that’s about it 😦 lol
Heehee I don’t believe you! It really is so simple – I am not like these other amazing ladies who crochet massive and intricate blankets etc. Come on, you can do it!!!
I’ll crochet online via Pixlr or Photoshop Maryanne, perhaps I can do that. I’m a mess when I’m actually holding things and trying to design them LOL.
hahah, yeah I actaully know what you mean 🙂 LOL
hahah, yeah I actually know what you mean 🙂 LOL
How sweet and simple and effective! I like the names. 🙂
hehe thank you! Now I want to make one for every fruit I can think of …sigh!
Oh simply adorable!! Thanks for the pattern, I can’t wait to try them. (after I hook like a lunatic for my show in 2 weeks) My wino friends will be thrilled to have a set 🙂
Yay! Good luck with your show – I had a tiny taste of the work involved and it’s beyond frantic. Let’s us know how it goes!
Mixing wine and crochet – I like the way you think!
Ditto – Clink Clink!!
So gorgeous!!! xxx
Thank you Laura! 🙂
What a lovely post!!! Your little flower thingies are so cute! Love the look of your stall! Wish I could have been there, I would have bought lots of yarn! Enjoy the public holiday today! 🙂
Summer fruits is so perfect for them, all bright, colourful and cheerful. 🙂
Thanks so much…I was so lucky with what I had in my stash – worked out so well, phew!
what a super idea and so simple.
Ahh thanks so much – give them a try x
Brilliant! I love them and will no doubt be having a go at them very soon. Well done for getting something finished for the challenge… Not sure I’m going to manage it this time 😦 but like Arnie says… I’ll be baaaaaaccckkkk!!
Thanks Trish! Don’t worry at all – Gosh, I am just so shocked at how you and some others make so many wonderful things…and them some….in such a short period. I look forward to your next offering xxx
Love this idea – and I especially love the photos of them on weathered wood for a background. Looks great! =D
Thank so much! I think I love taking the pics more than actually making them…nothing nicer than plain old wood:)
Your frustrations were obviously meant to be! They are really great 🙂 (On my blog there is a link to a video showing another way to thread beads onto yarn if you are interested.)
Really! Thanks, I will go and have a look (will save me from more tantrums!!!)
I hope so!
Maryanne you are like a magic lady, you can translate any idea into pattern language, how on Earth do you do it!!! And you have photographic finesse too you are seriously UNBELIEVABLE!!!!
That’s why you are my BFF – you say the sweetest things that make me wipe a tear xxxx
What a fab idea Maryanne! I might have to add those to my to do list 🙂
Please do! Would love to see too x
I love these! Added to my list-of-things-to-do as well. 😀
Reblogged this on G-Ma Ellen's Hands – Adventures in Crochet and Knit and commented:
I love, love . . . love this! Going to give it a try! Soon! Today is just about all used up. ; )
Ahhh thank you so much for reblogging this! I have been meaning to tweak it a little (after having just made 60 of them for my sister-in-laws wedding!) so if you want a variation… here goes:
Add charm/bead and secure in place with a slip knot
Chain 13
Turn (don’t chain one)
Single crochet in the next 12 stitches
Turn (don’t chain one)
Slip stitch into the first stitch
Double Crochet into the second stitch, then 5 Triple Crochet into the SAME stitch (first petal made)
Slip stitch into the next stitch
*Triple Crochet 6 times into the next stitch (second petal made)
Slip stitch into the next*
REPEAT THE STITCHED BETWEEN ** TO MAKE ANOTHER 2 PETALS
Triple Crochet into the next stitch 5 times
Chain 2
Slip stitch into the last stitch (this effectively makes a little button-hole to secure the bead or charm to)
Finish off and sew in ends
xxxx
Thank you! I’ll try it! 😀
Pingback: April’s “Made It” – Sew Exciting! | woolhogs